faq:email:mail_setup_ms_outlook_imap
This is an old revision of the document!
Email Setup Guide for Microsoft Outlook 2013 (IMAP)
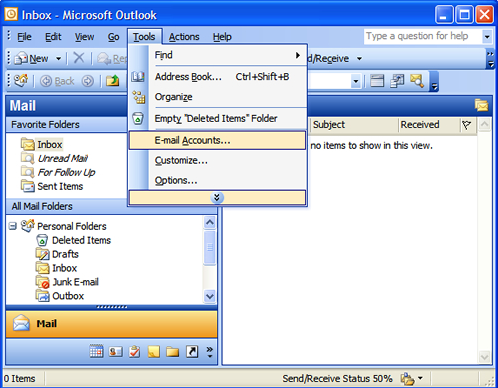
- In Microsoft Outlook, from the menu, select Tools then E-mail Accounts.
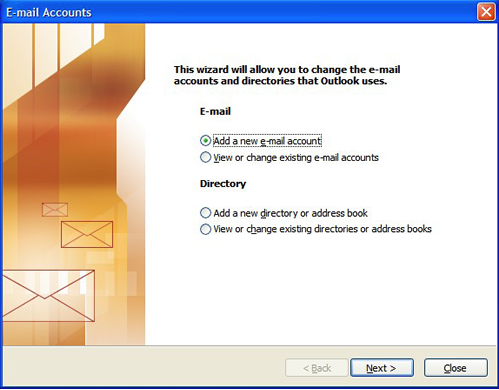
- On the E-mail Accounts wizard window, select Add a new e-mail account, and then click Next.
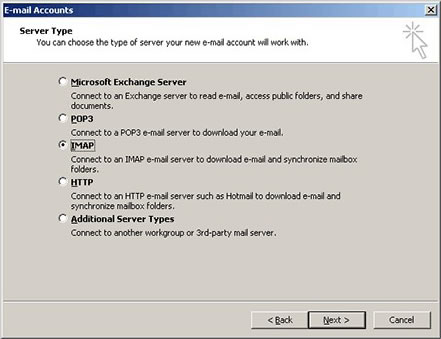
- On the Server Type page, make sure to choose “IMAP” as the server type.
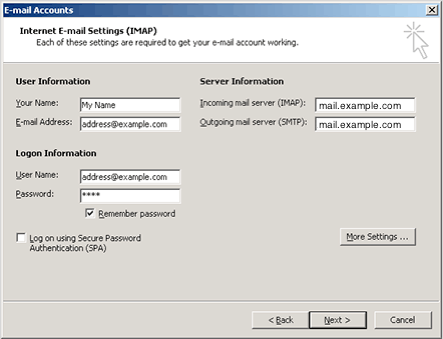
- On Internet Email settings, enter in the following information (replacing “example.com” with your domain name):
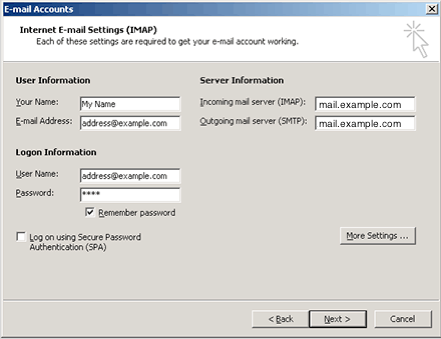
Now we need to setup the outgoing email. To do this, click on the “More Settings” button, where you’ll be presented with the following screen.
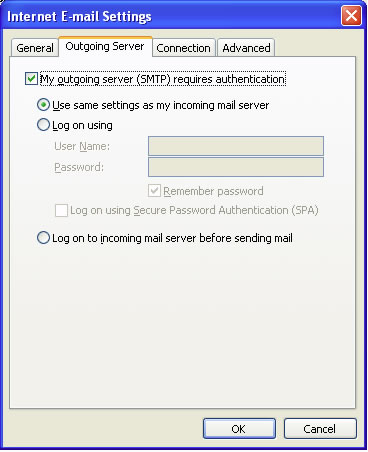
- On the Outgoing Server tab, make sure that the option for My Outgoing Server (SMTP) requires authentication is checked.
Choose Use same settings as my incoming mail server.
- Go to the Advanced tab. Check that the port numbers for both incoming and outgoing servers are correct.
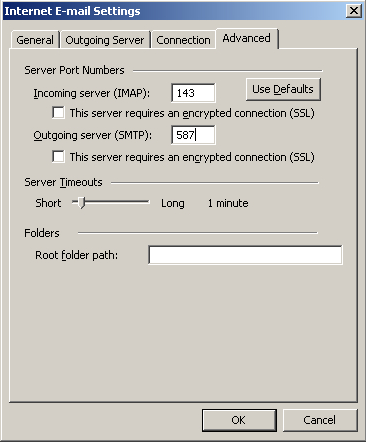
Click “OK” to save the settings done.
- Now we’re back to the Email Accounts page. Click “Next”.
- Click “Finish”.
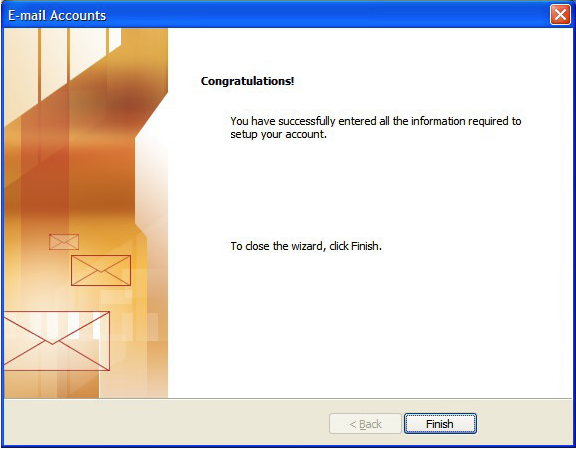
Your account is successfully added to your Microsoft Outlook.
faq/email/mail_setup_ms_outlook_imap.1438070544.txt.gz · Last modified: 2015/07/28 16:02 by vikki
Except where otherwise noted, content on this wiki is licensed under the following license: CC Attribution-Share Alike 4.0 International
